Sample Managers
This section gives an overview of the COPO features that are delegated to Biodiversity Genomics Europe (BGE) checker or sample managers [1] who are responsible for accepting or rejecting samples produced by sample submitters [2].
Note
-
Make a request to the indicating the type of profile manifest group that you would like to be assigned to as a sample manager BGE.
The permission will be granted after the request has been approved.
See also
Accessing the Accept or Reject Samples web page
Note
The  button will only appear on the web page if you
are granted permission to be a sample manager.
button will only appear on the web page if you
are granted permission to be a sample manager.
Once the button is clicked, the accept/reject samples web page will be displayed.
If you have been granted permission as a sample manager, you will receive an email notifying you that sample(s) has been submitted after a user uploads a manifest.
Similarly, you will receive an email when samples have been rejected.
Click the button to accept or reject samples.
Alternatively, navigate to Accept/Reject Samples’ web page.
Guidelines for Sample Managers Assigned to More than one Manifest Group
Note
The manifest dropdown menu will only be displayed on the Accept or Reject samples web page if you as a sample manager, belongs to more than one sample manager manifest group.
Hint
If the dtol sample manager group dropdown menu option is selected, both Aquatic Symbiosis Genomics (ASG) [3] profiles and Darwin Tree of Life (DToL) [4] profiles will be displayed in the All profiles tab (if any exists).
If you have been granted permission to be a sample manager for more than one manifest group, you can accept or reject samples for more than one manifest group by following the steps below:
-
Click the dropdown menu displayed beside the Choose to Accept or Reject web page title on the left side of the Accept or Reject Samples web page as shown below:
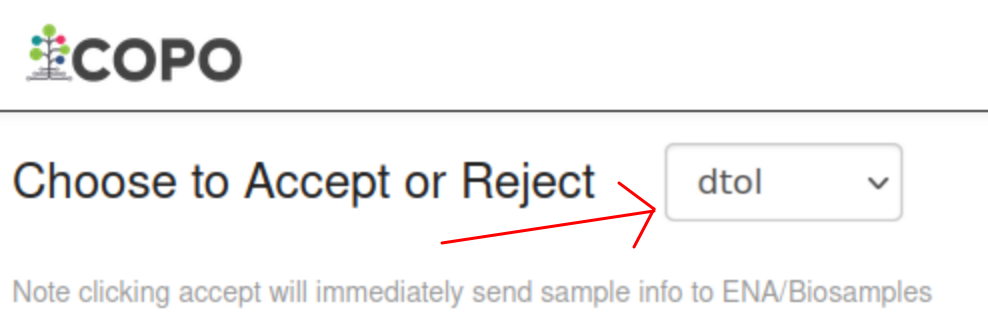
Accept or Reject Samples web page: Manifest dropdown menu beside ‘Choose to Accept or Reject’ web page title
-
A list of all the manifest groups that you have been assigned to is then displayed.
Choose the desired manifest group from the dropdown menu as shown below:

Accept or Reject Samples web page: Manifest dropdown menu with options displayed
-
To accept samples, see the Accepting samples section
OR
To reject samples, see the Rejecting samples section


Accepting or Rejecting Samples
Note
A Samples table record will only be displayed if the desired profile that is clicked/highlighted on the left of the web page has submitted samples.
Hint
See Accept or Reject Samples for more than one manifest group section for guidance if you are assigned to more than one manifest group and would like to accept or reject samples.
Accepting samples
The following sections describe how to accept samples depending on the type of manifest group that you have been assigned as a sample manager to:
Accepting ASG or DTOL samples
-
Choose desired profile on the left of the Accept or Reject Samples web page
-
In the Pending Samples tab, select desired sample record(s) by clicking the checkbox(es) associated with the sample record(s).
Then, click the
 button as shown below.
Accept or Reject Samples web page: Accepting samples within ASG or DTOL profiles

Accepting ERGA samples as a BGE checker
Note
In the Samples table, sample record(s) will only be displayed in the Pending BGE Checker Samples tab, if you are assigned as a Biodiversity Genomics Europe (BGE) checker for the desired profile.
All COPO ERGA [5] profiles are displayed in the All Profiles tab but submitted samples within them cannot be accepted or rejected.
-
Choose desired profile on the left of the Accept or Reject Samples web page
From the Profiles for My Sequencing Centre tab
-
In the Pending BGE Checker Samples tab, select desired sample record(s) by clicking the checkbox(es) associated with the sample record(s).
Then, click the
button as shown below.
Accept or Reject Samples web page: Accepting samples within ERGA profiles as a Biodiversity Genomics Europe (BGE) checker
-
In the Pending BGE Checker Samples tab, select desired sample record(s) by clicking the checkbox(es) associated with the sample record(s).
Then, click the
button as shown below.
Accept or Reject Samples web page: Samples accepted by Biodiversity Genomics Europe (BGE) checker are displayed in ‘Pending Samples’ tab
Accepting ERGA samples as a Sample Manager
Note
In the Samples table, sample record(s) will only be displayed in the Pending Samples tab for the desired profile after they have been accepted by a Biodiversity Genomics Europe (BGE) checker.
All COPO ERGA [5] profiles are displayed in the All Profiles tab but submitted samples within them cannot be accepted or rejected.
Hint
Rejected samples are displayed in the Rejected Samples tab.
-
Choose desired profile on the left of the Accept or Reject Samples web page
From the Profiles for My Sequencing Centre tab
-
In the Pending Samples tab, select desired sample record(s) by clicking the checkbox(es) associated with the sample record(s).
Then, click the
button as shown below.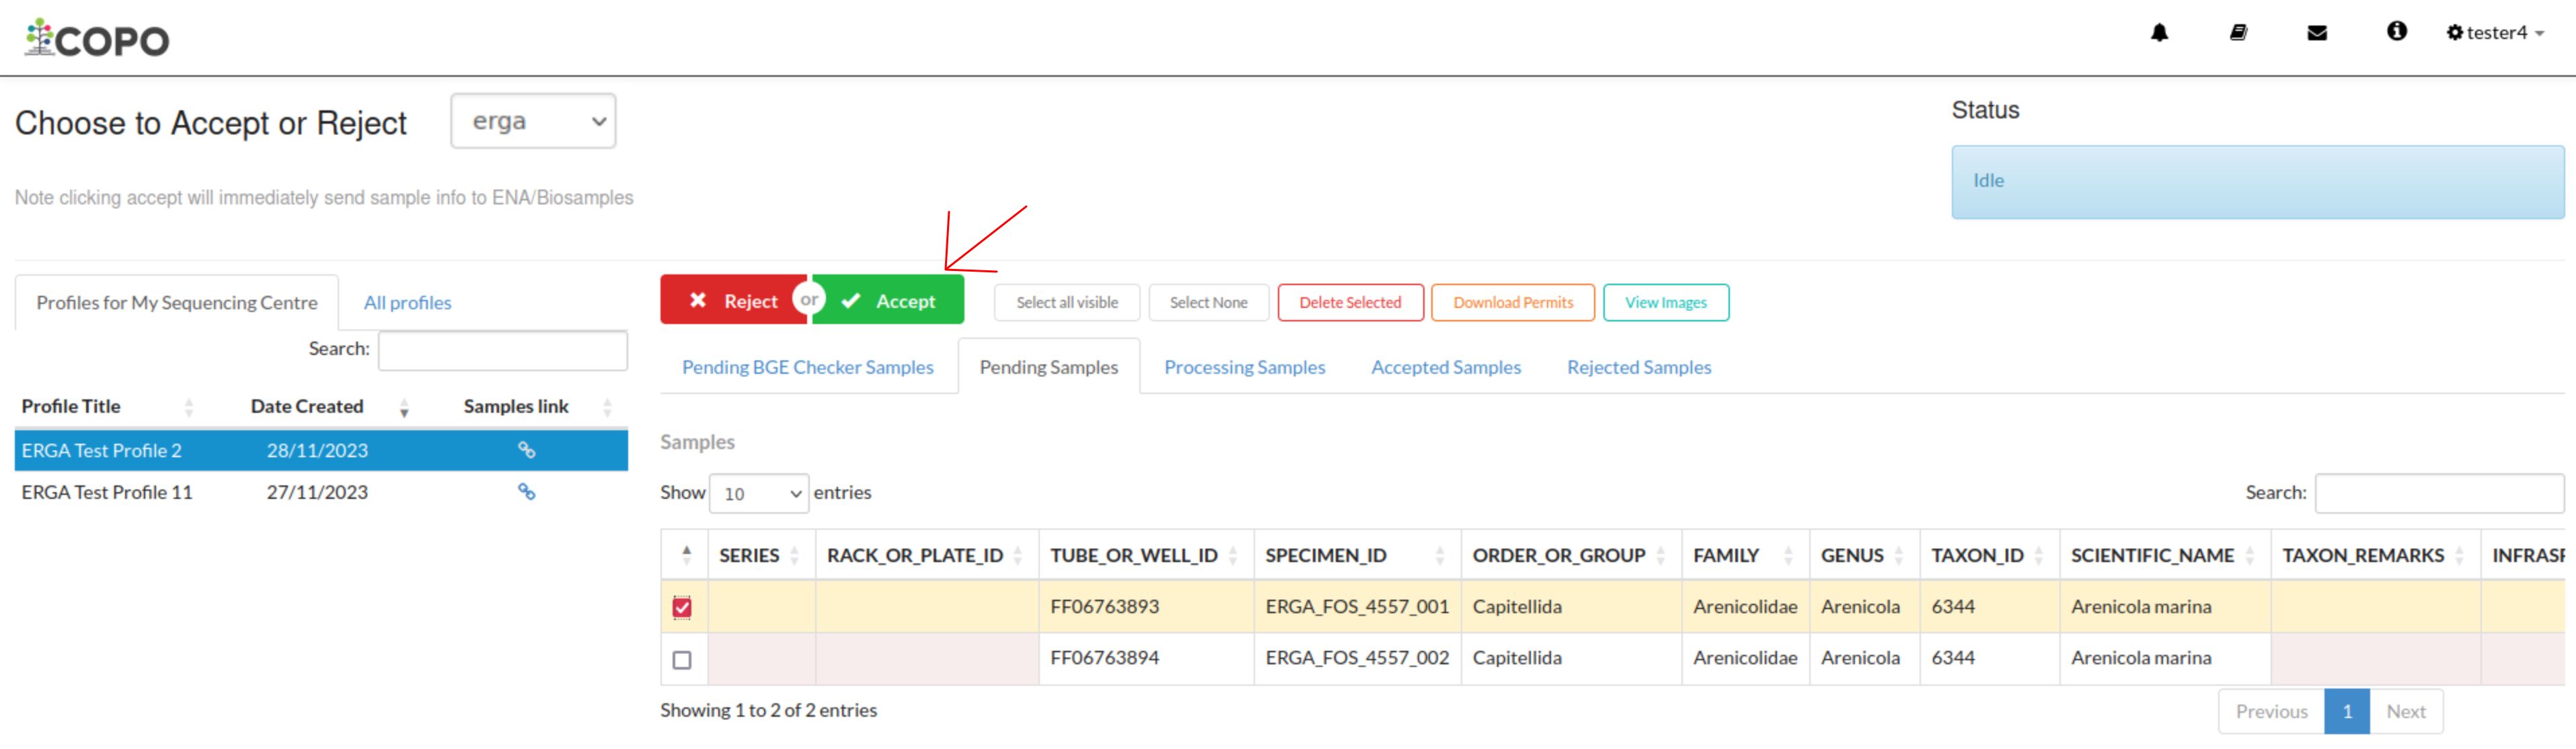
Accept or Reject Samples web page: Accepting samples within ERGA profiles
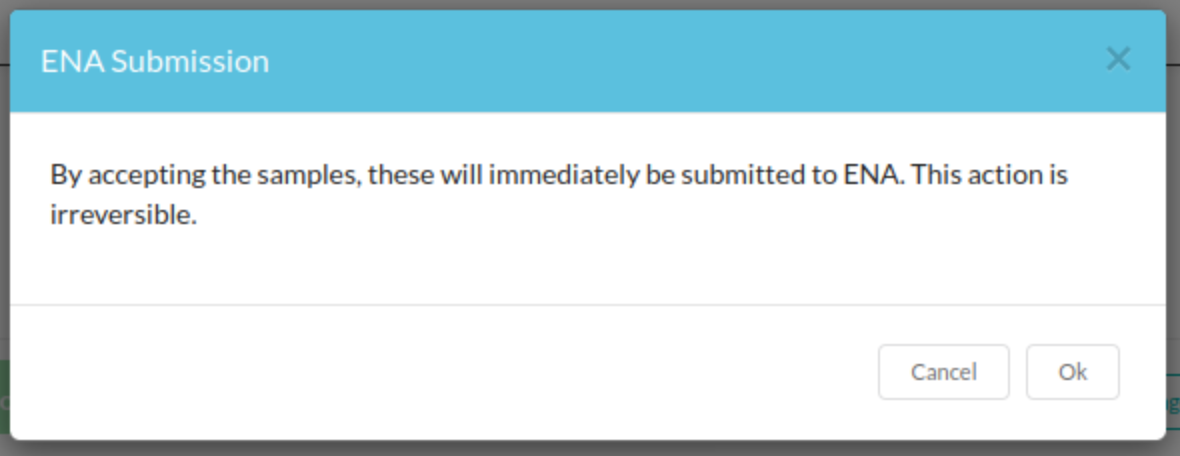
A confirmation popup dialogue will be displayed as shown below.
Click the Ok button to accept the selected sample record(s) or click the Cancel button to cancel the action.

Accept or Reject Samples web page: Accept samples confirmation dialogue
-
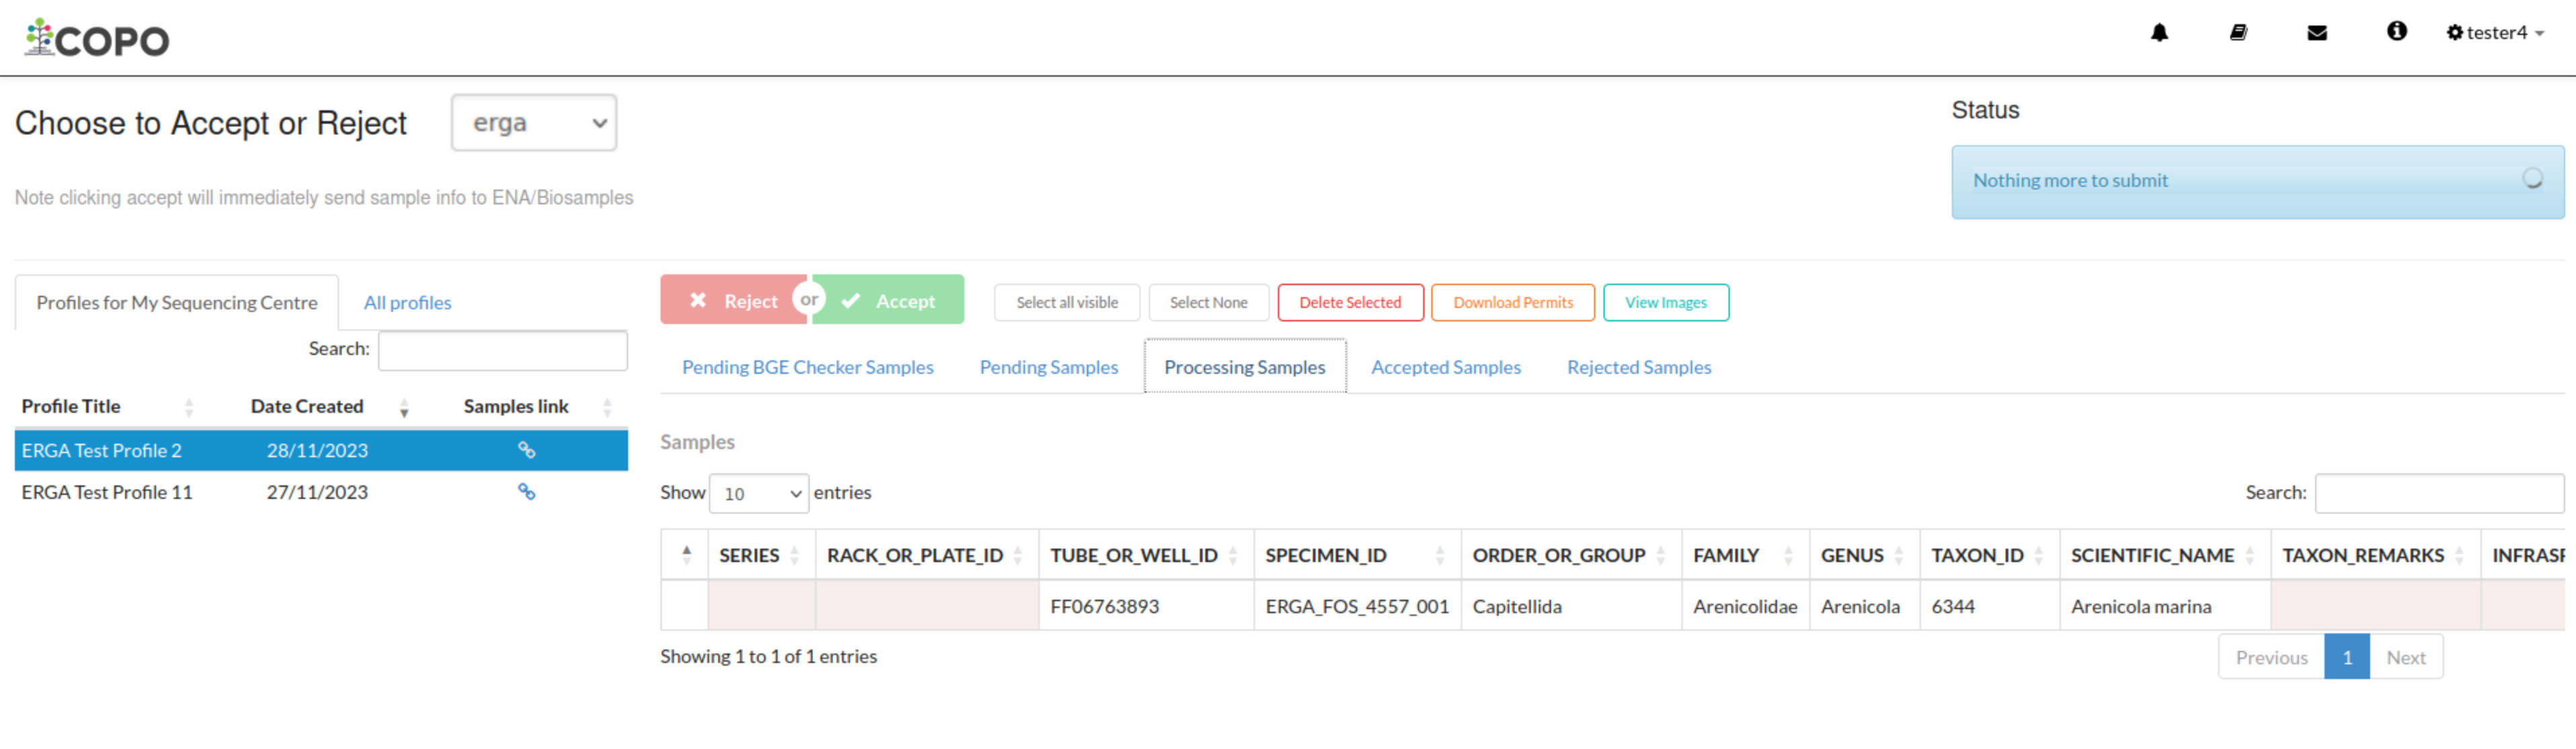
If the Ok button is clicked, the accepted samples will proceed to the processing stage and will be displayed in the Processing Samples tab as shown below:
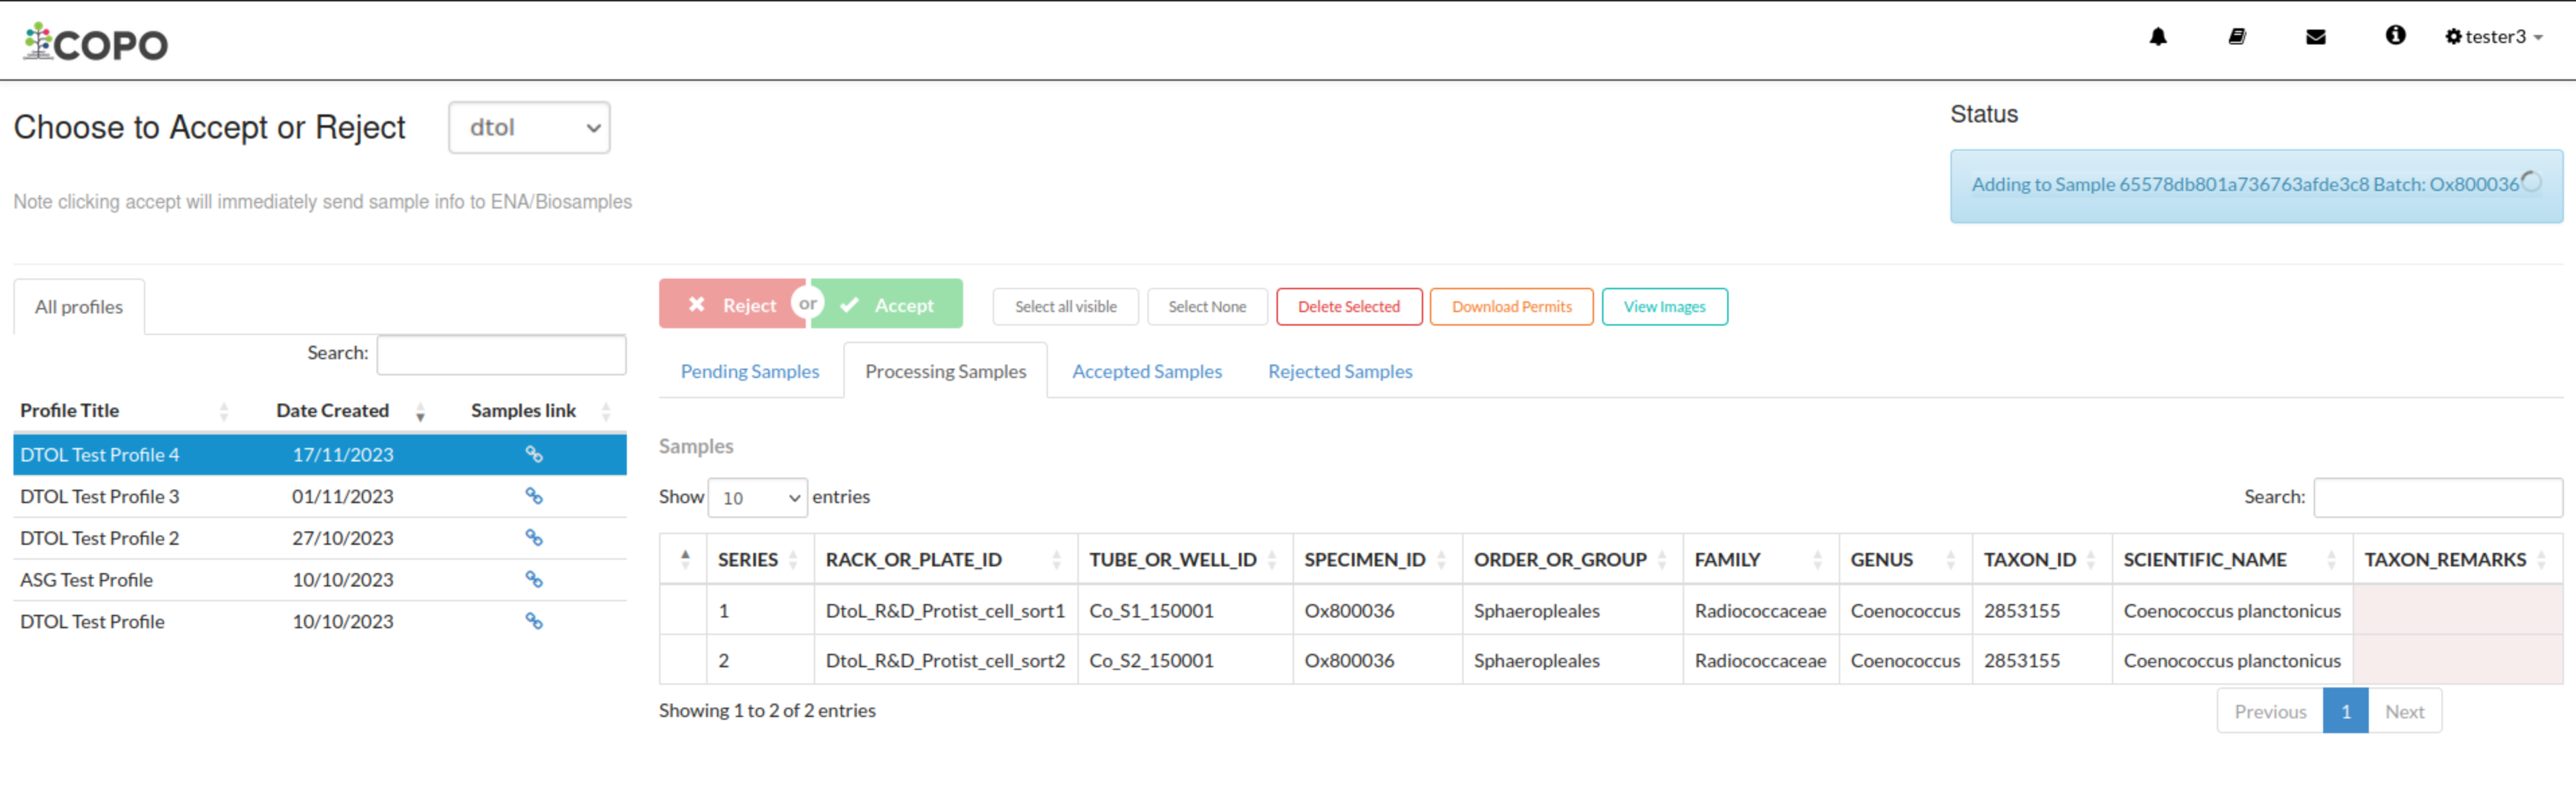
Accept or Reject Samples web page: Accepted ASG or DTOL samples at the processing stage
OR

Accept or Reject Samples web page: Accepted ERGA samples at the processing stage
-
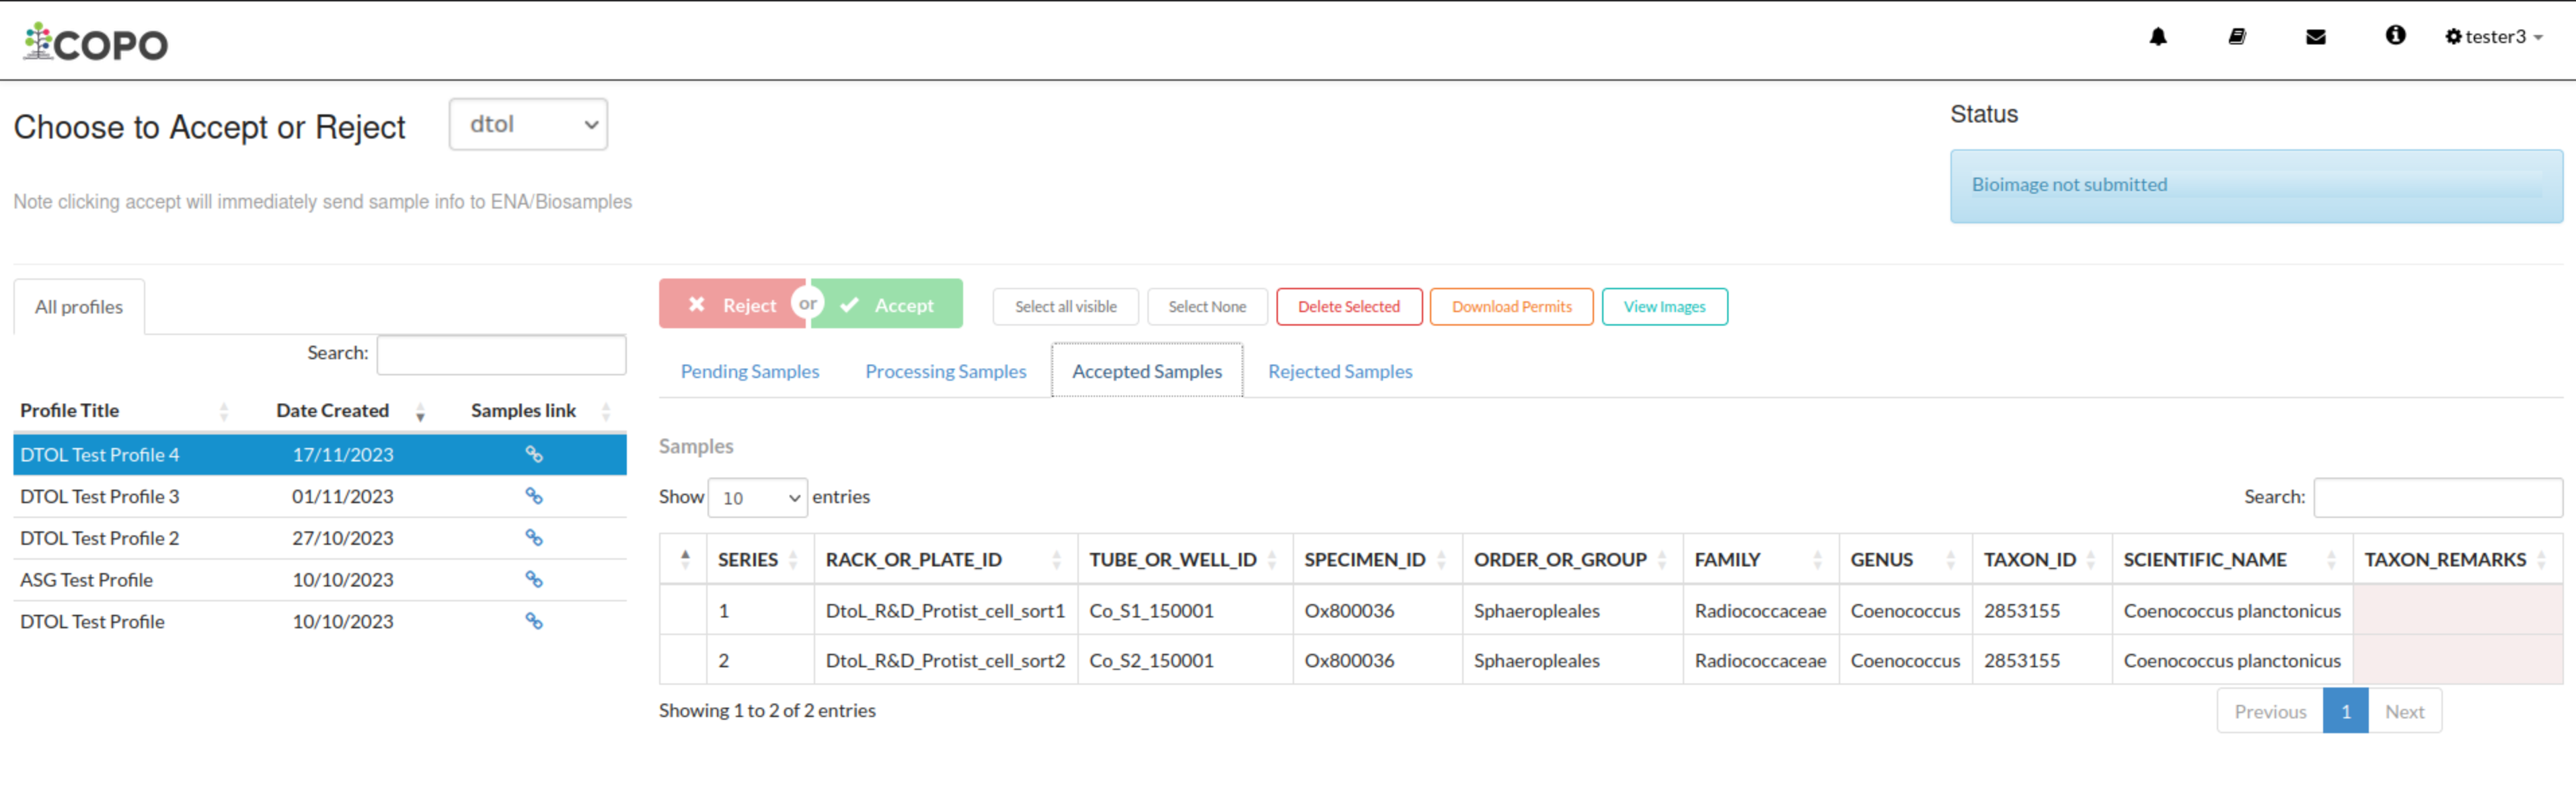
After the samples have been processed, the samples will proceed to the accepted stage and will be displayed in the Accepted Samples tab as shown below:

Accept or Reject Samples web page: Accepted ASG or DTOL samples at the accepted stage
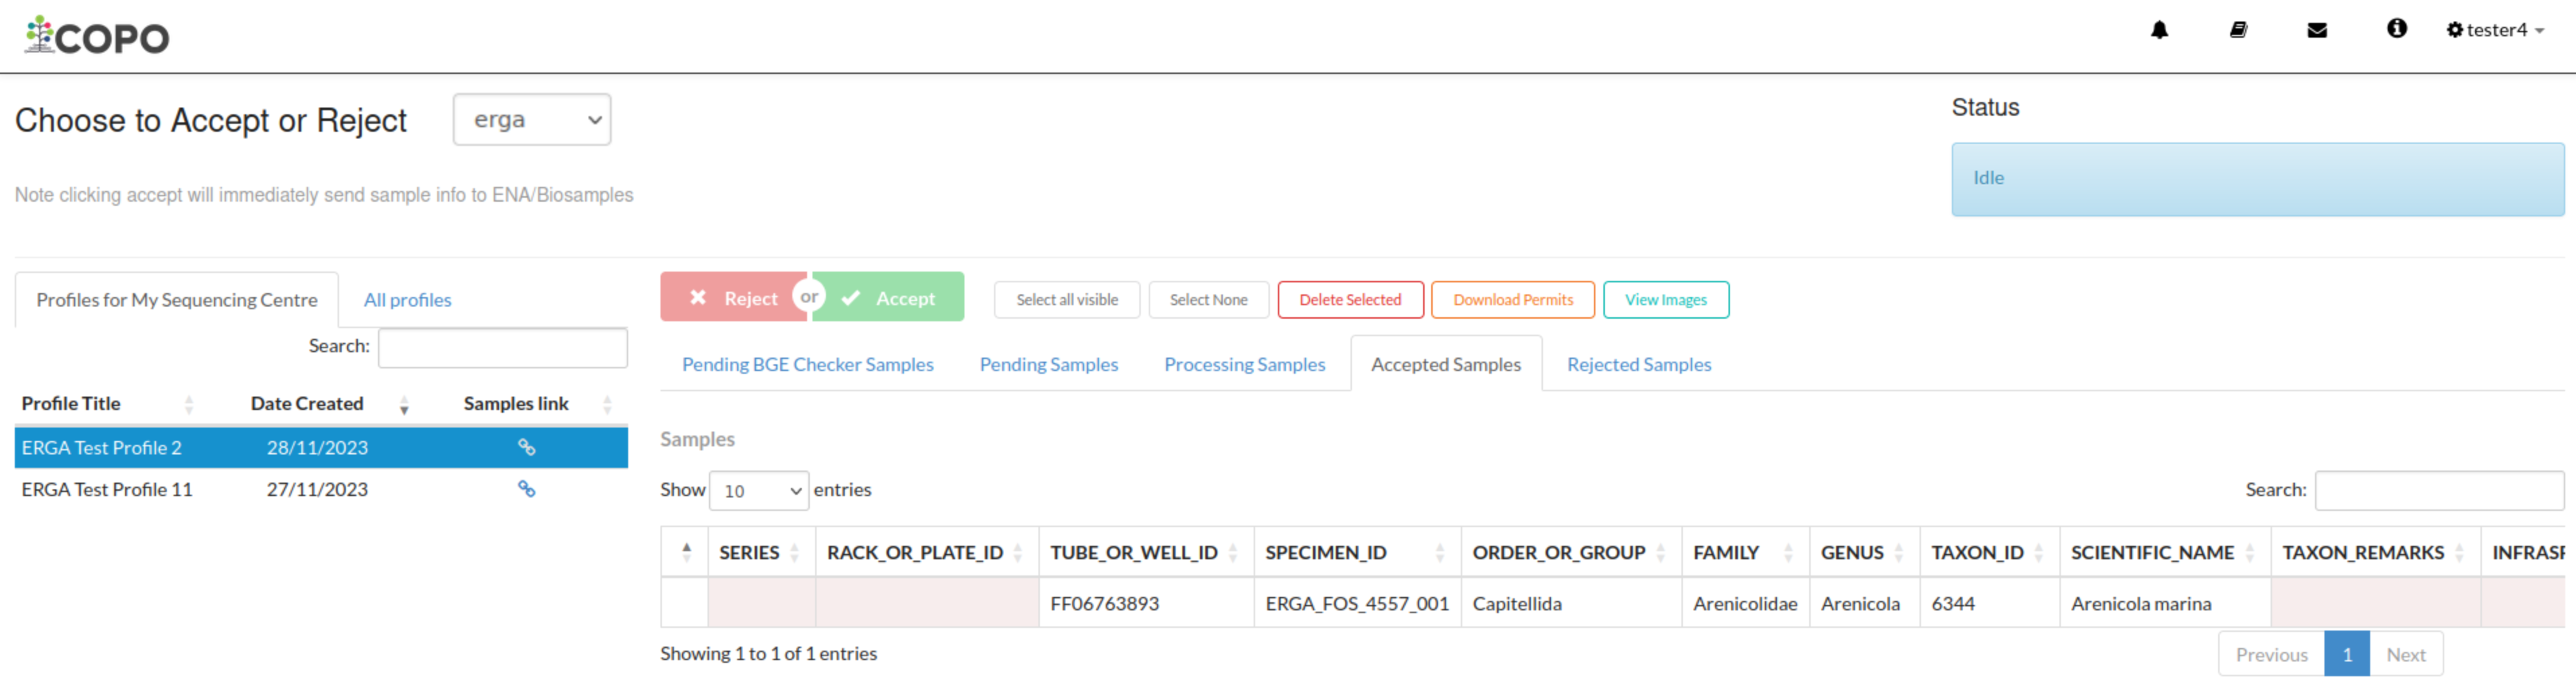
OR

Accept or Reject Samples web page: Accepted ERGA samples at the accepted stage


Rejecting samples
-
Choose desired profile on the left of the Accept or Reject Samples web page
From the Profiles for My Sequencing Centre tab - if desired profile is an ERGA [5] profile
OR
From the All Profiles tab if desired profile is not an ERGA [5] profile
-
In the Pending Samples tab, select desired sample record(s) by clicking the checkbox(es) associated with the sample record(s).
Similarly, if you are a Biodiversity Genomics Europe (BGE) checker, select desired sample record(s) from the Pending BGE Checker Samples tab.
Then, click the
 button as shown below:
Accept or Reject Samples web page: Rejecting samples
-
The samples will proceed to the rejected stage and will be displayed in the Rejected Samples tab as shown below:
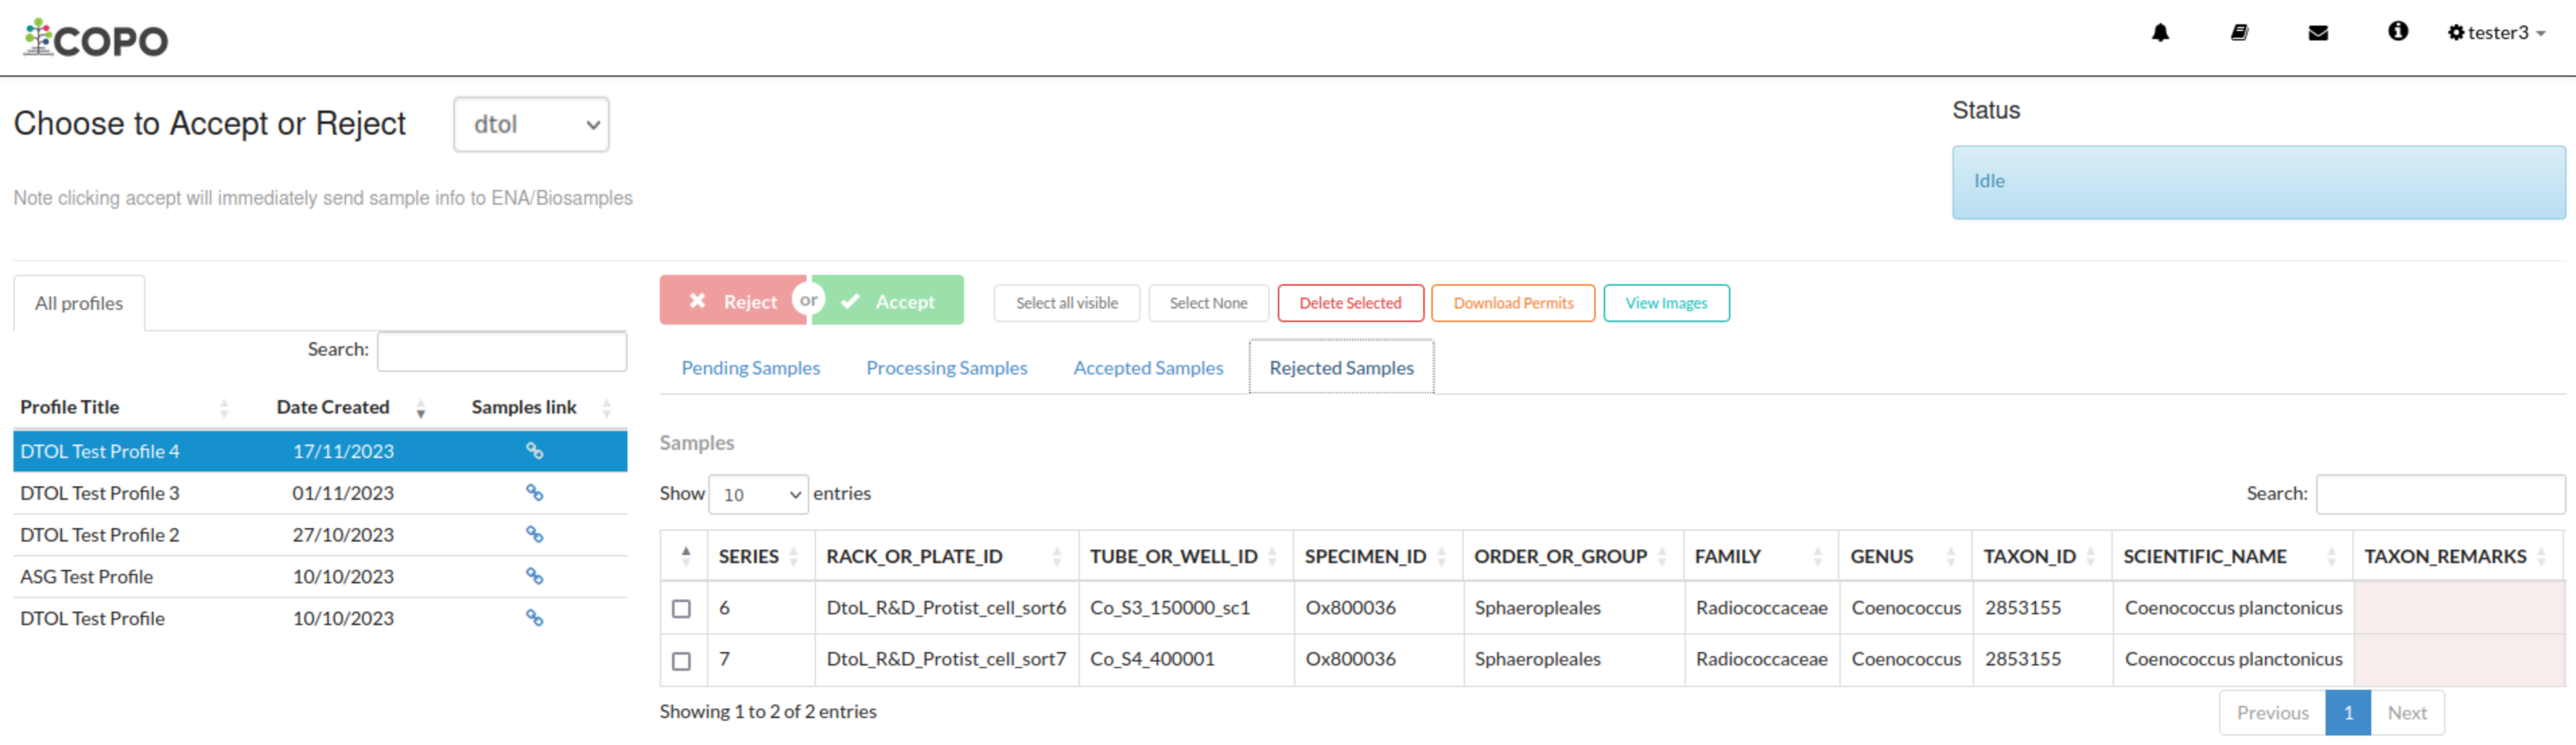
Accept or Reject Samples web page: Rejected samples at the rejected stage


Download Submitted Permits
If you have been assigned as a sample manager, you can view the permits submitted for submitted sample(s) on the Accept/Reject Samples’ web page by following the steps below:
Note
Permits can only be downloaded for submitted samples that are pending action by a sample manager or have been accepted by a sample manager.
Permits exist for ERGA [5] profiles only.
Hint
To download submitted permits for samples within the Accepted Samples tab, CTRL + Click the desired sample
record(s) then, click the  button to download permit(s) submitted for the selected
record(s).
button to download permit(s) submitted for the selected
record(s).
-
Navigate to the Accept or Reject Samples web page.
See How to access Accept or Reject Samples web page section for guidance on how to access the Accept or Reject Samples web page.
-
Select the sample record(s) that you would like to download the permits for.
Then, click the
button to download permit(s) submitted for the selected sample record(s). -
If any permit submission(s) exist for the selected sample record(s), the permits will be automatically downloaded for the selected sample record(s) as shown below:
Hint
Permits are downloaded as a
.zipfileIf no permits were submitted for the selected sample record(s), a message is displayed in the popup dialogue indicating such as shown below:
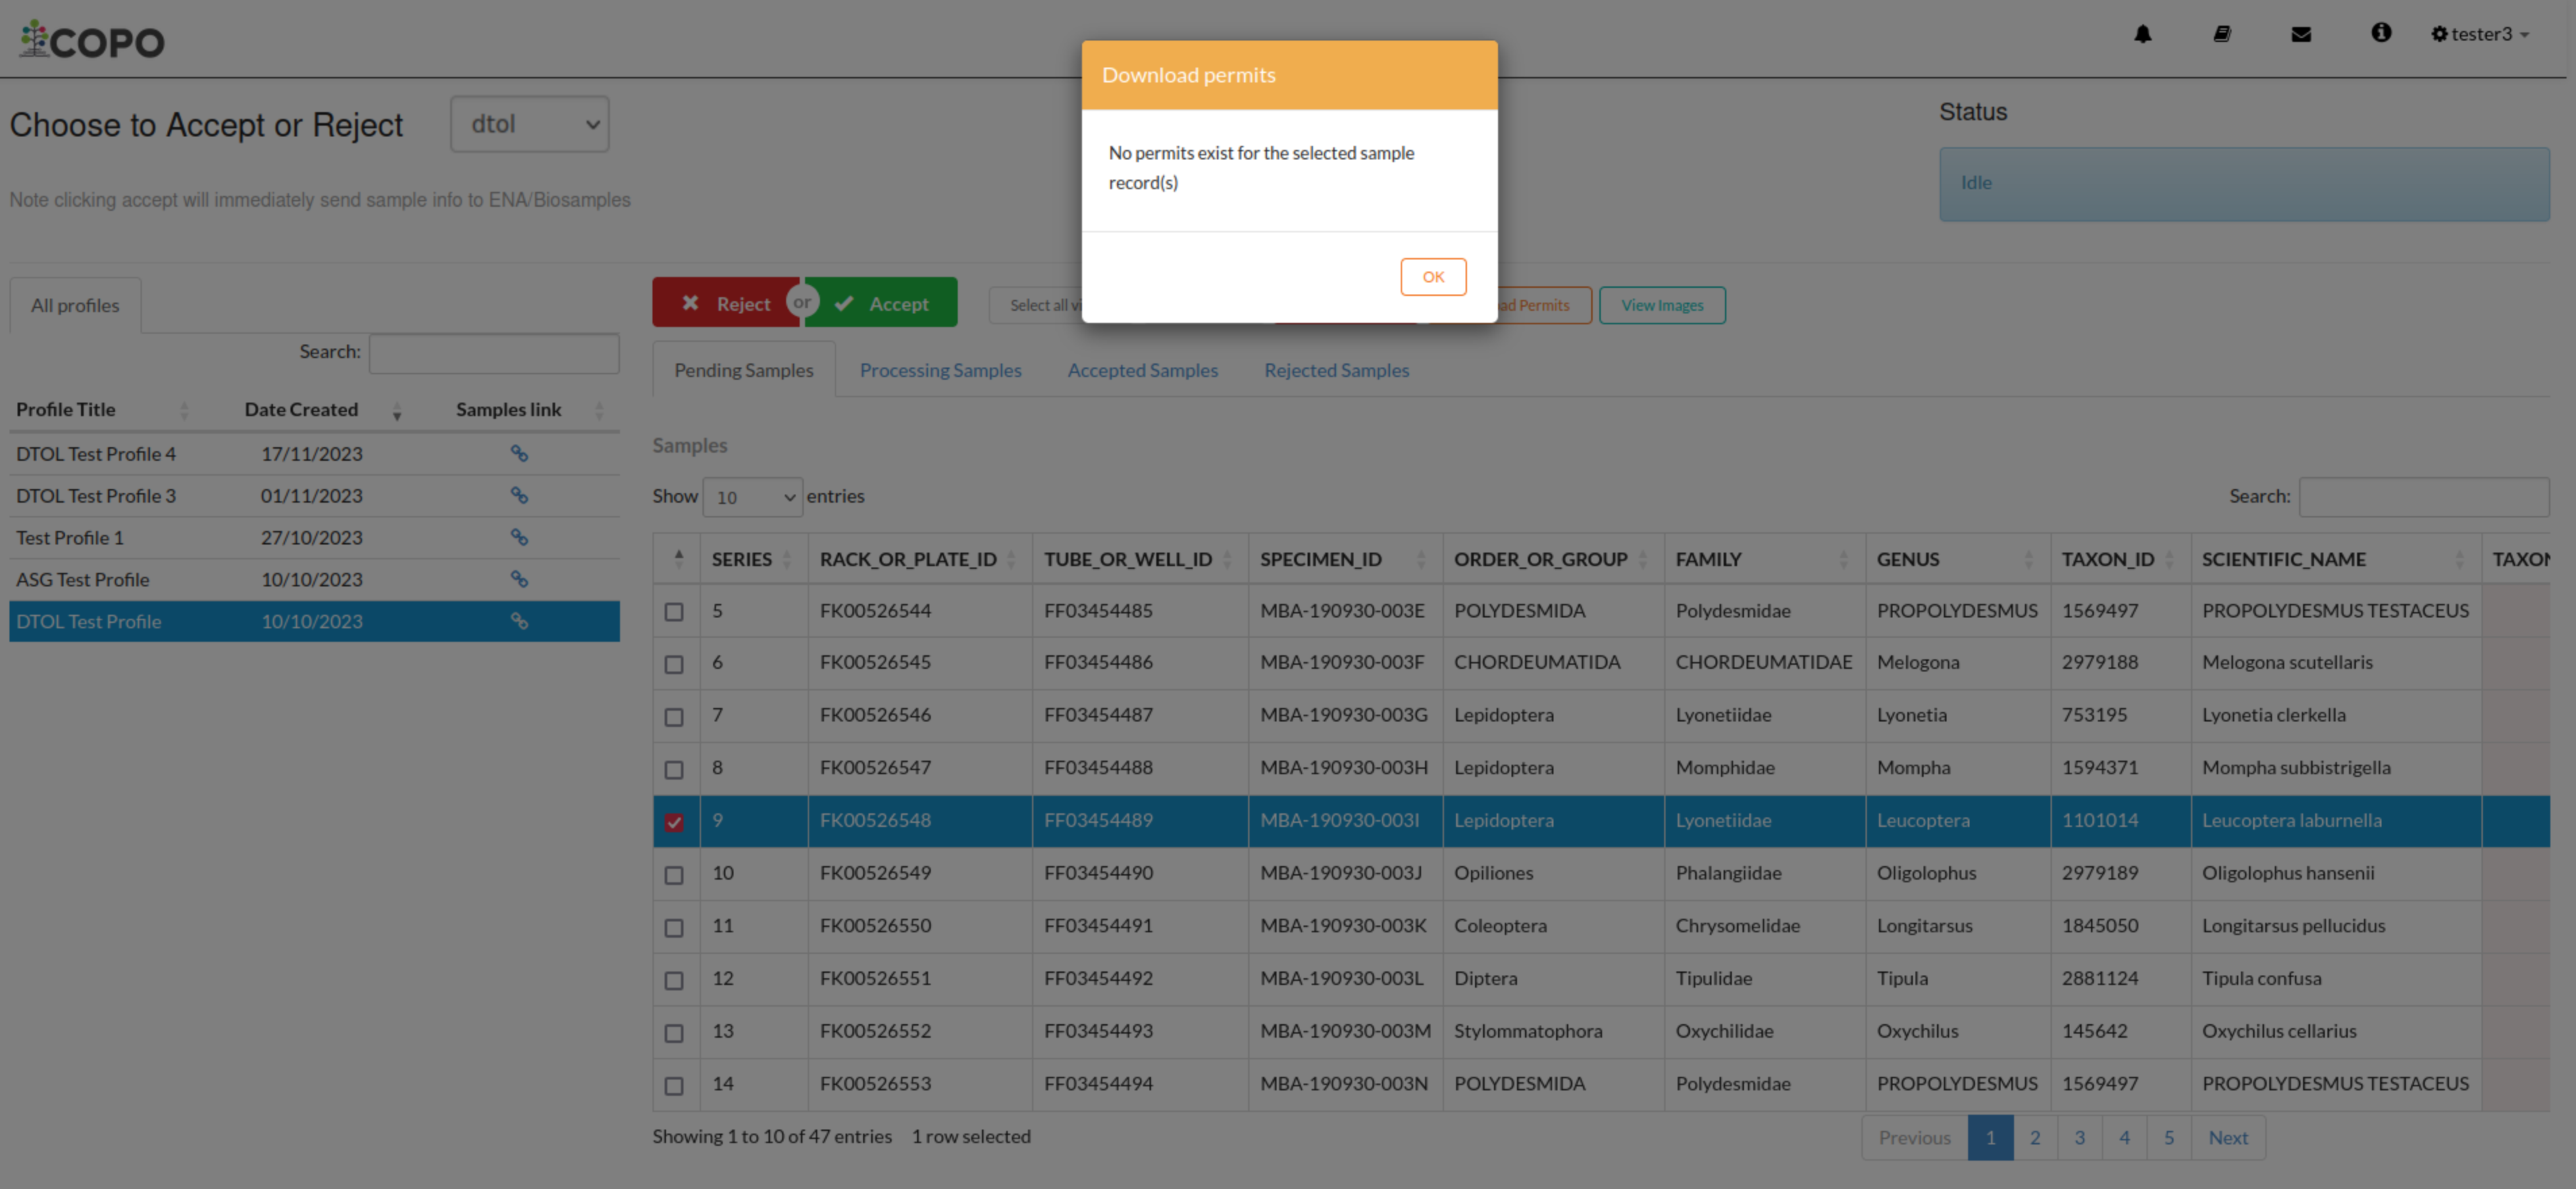
Accept or Reject Samples web page: Popup dialogue displaying message, ‘No permits exist for selected sample record(s)’

View Submitted Images
If you have been assigned as a sample manager, you can view the images submitted for submitted sample(s) on the Accept/Reject Samples’ web page by following the steps below:
Hint
To view submitted images for samples within the Accepted Samples tab, CTRL + Click the desired sample
record(s) then, click the  button to view image(s) submitted for the selected record(s).
-
Navigate to the Accept or Reject Samples web page.
See How to access Accept or Reject Samples web page section for guidance on how to access the Accept or Reject Samples web page.
-
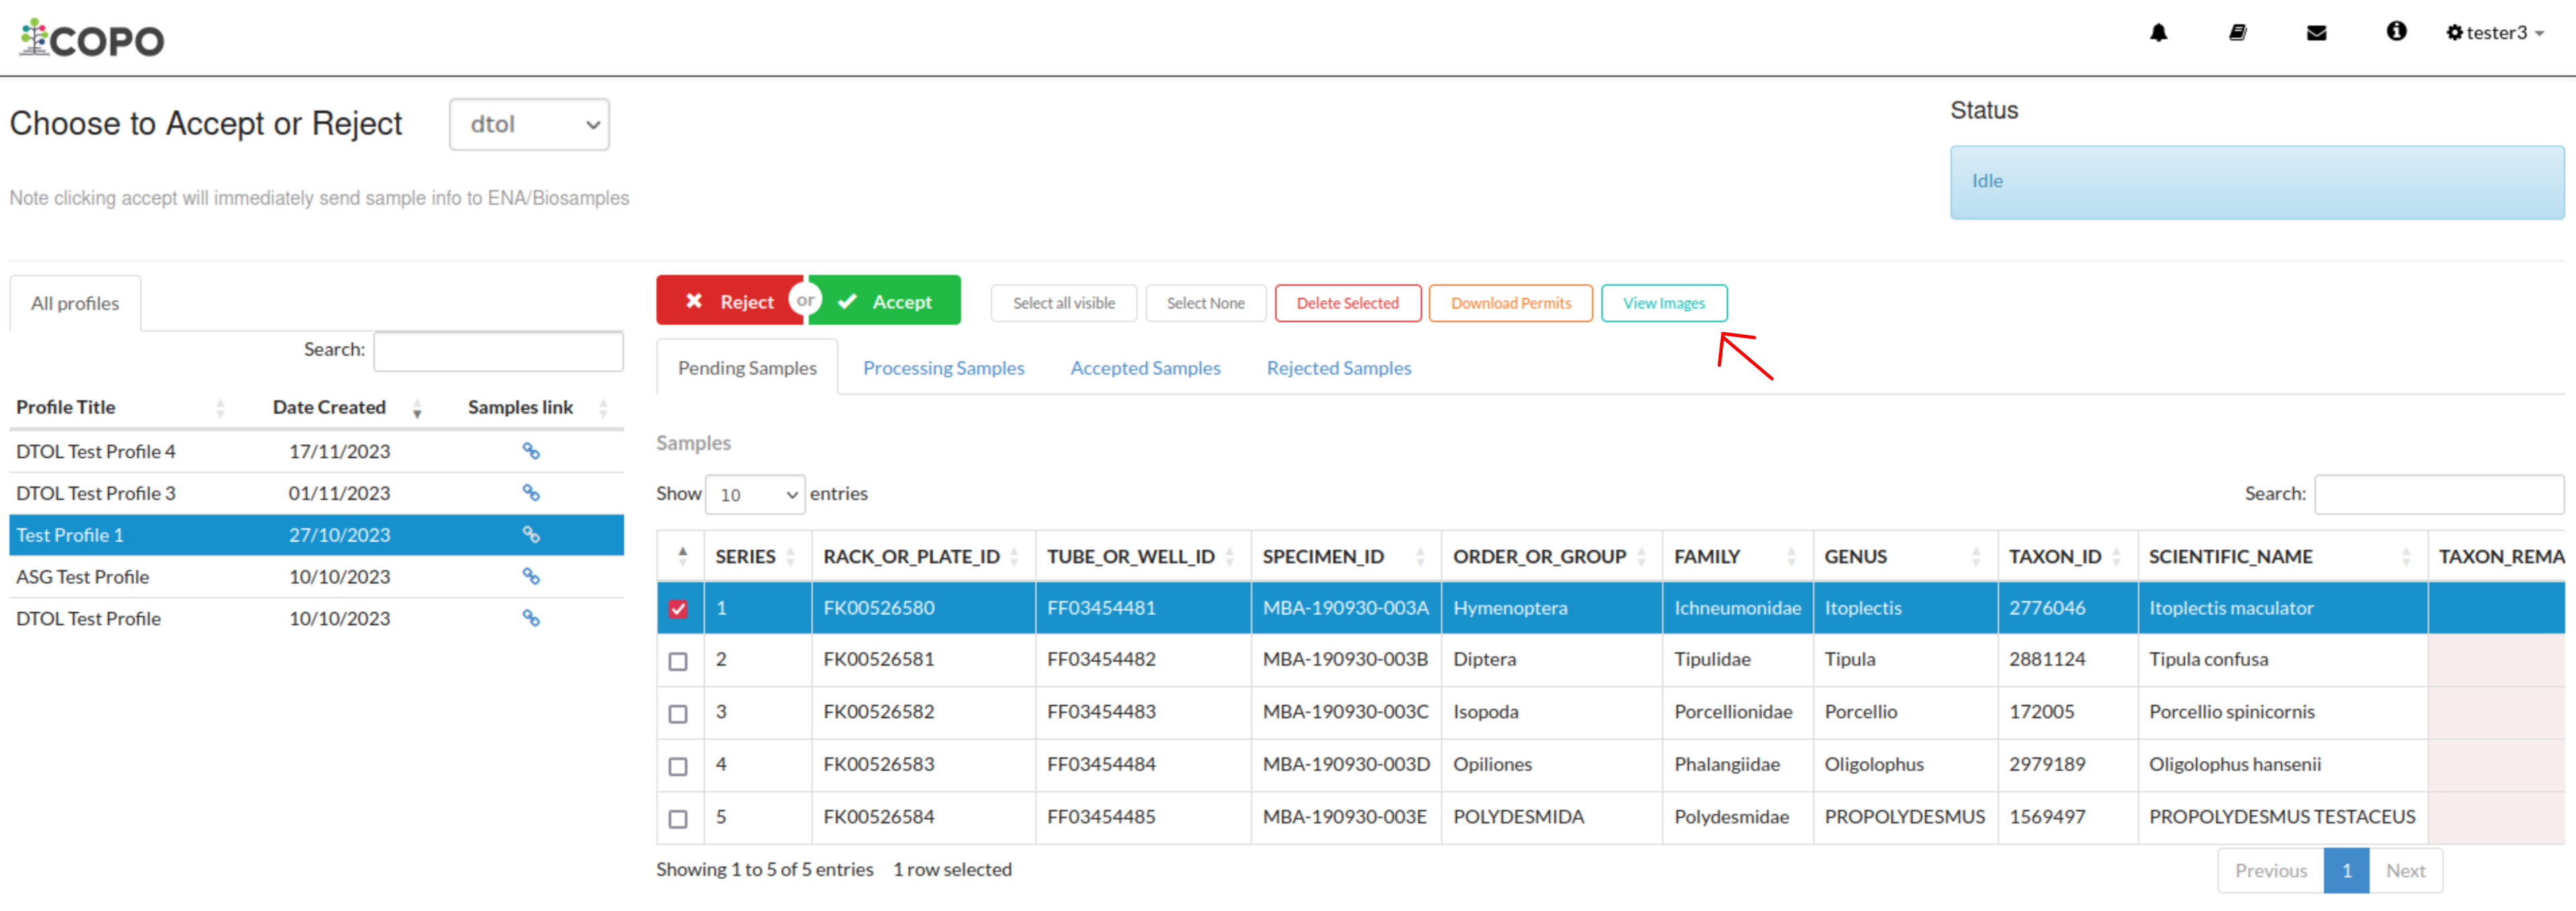
Select the sample record(s) that you would like to view the images for.
Then, click the
button to view image(s) submitted for the selected sample record(s).
Accept or Reject Samples web page: Pointer to ‘View images’ button
-
If any image submission(s) exist for the selected sample record(s), a popup dialogue will be displayed with the image(s) submitted for the selected sample record(s) as shown below:
Hint
Click the image to view a larger version.

Accept or Reject Samples web page: Popup dialogue displaying submitted image(s) for selected sample record(s)
OR
If no images were submitted for the selected sample record(s), a message is displayed in the popup dialogue indicating such as shown below:
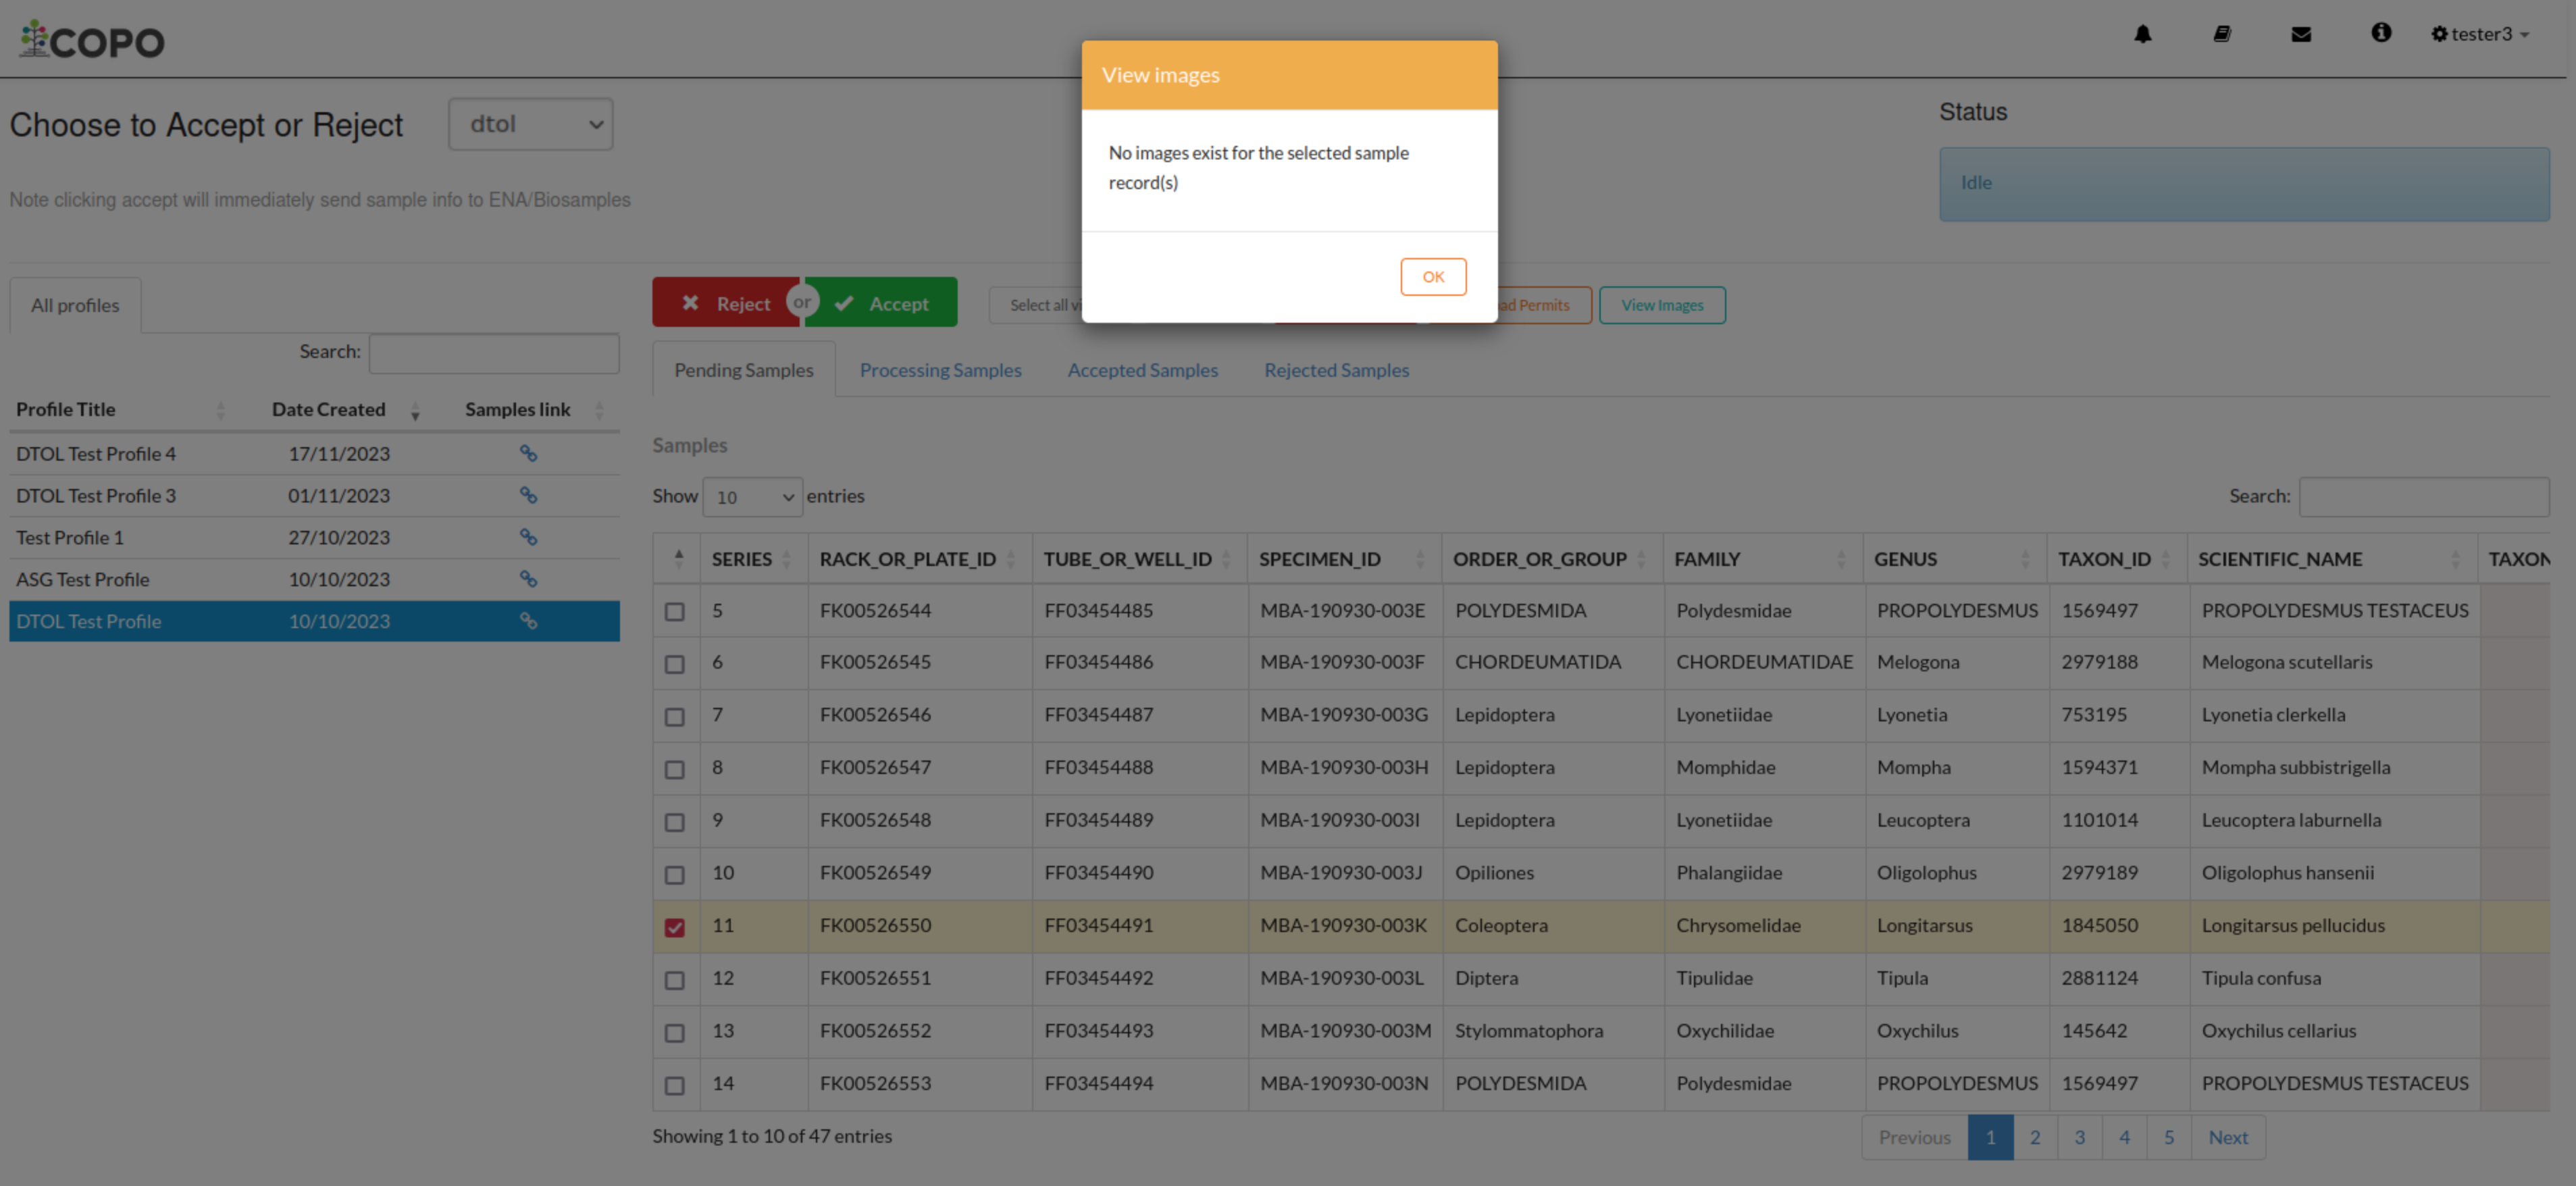
Accept or Reject Samples web page: Popup dialogue displaying message, ‘No images exist for selected sample record(s)’


Upload Manifest or Update Submitted Manifest on behalf of Manifest Submitters
Note
The manifest dropdown menu will only be displayed on the Accept or Reject samples web page if you as a sample manager, belongs to more than one sample manager manifest group.
If the dtol sample manager group dropdown menu option is selected, both Aquatic Symbiosis Genomics (ASG) profiles and Darwin Tree of Life (DToL) profiles will be displayed in the All profiles tab (if any exists).
The Samples table will only be displayed if the selected/highlighted profile has submitted samples.
Hint
See the Updating Samples section for information about which field values can be updated. Samples can be updated by resubmitting the manifest with the updated metadata.
The following steps can be followed to upload a manifest or update a submitted manifest on behalf of a manifest submitter [2]:
-
Navigate to the Accept or Reject Samples web page.
See How to access Accept or Reject Samples web page section for guidance.
-
On the left of the Accept or Reject Samples web page, click the
 icon in the Samples link table
column of the table row for the profile that you would like upload a manifest for or update a submitted manifest
for as shown below:
icon in the Samples link table
column of the table row for the profile that you would like upload a manifest for or update a submitted manifest
for as shown below:If the desired profile is an ASG profile or DTOL profile, navigate to the Samples web page by clicking the
icon in the Samples link table
column of the table row for the desired profile in the All Profiles tab as shown below: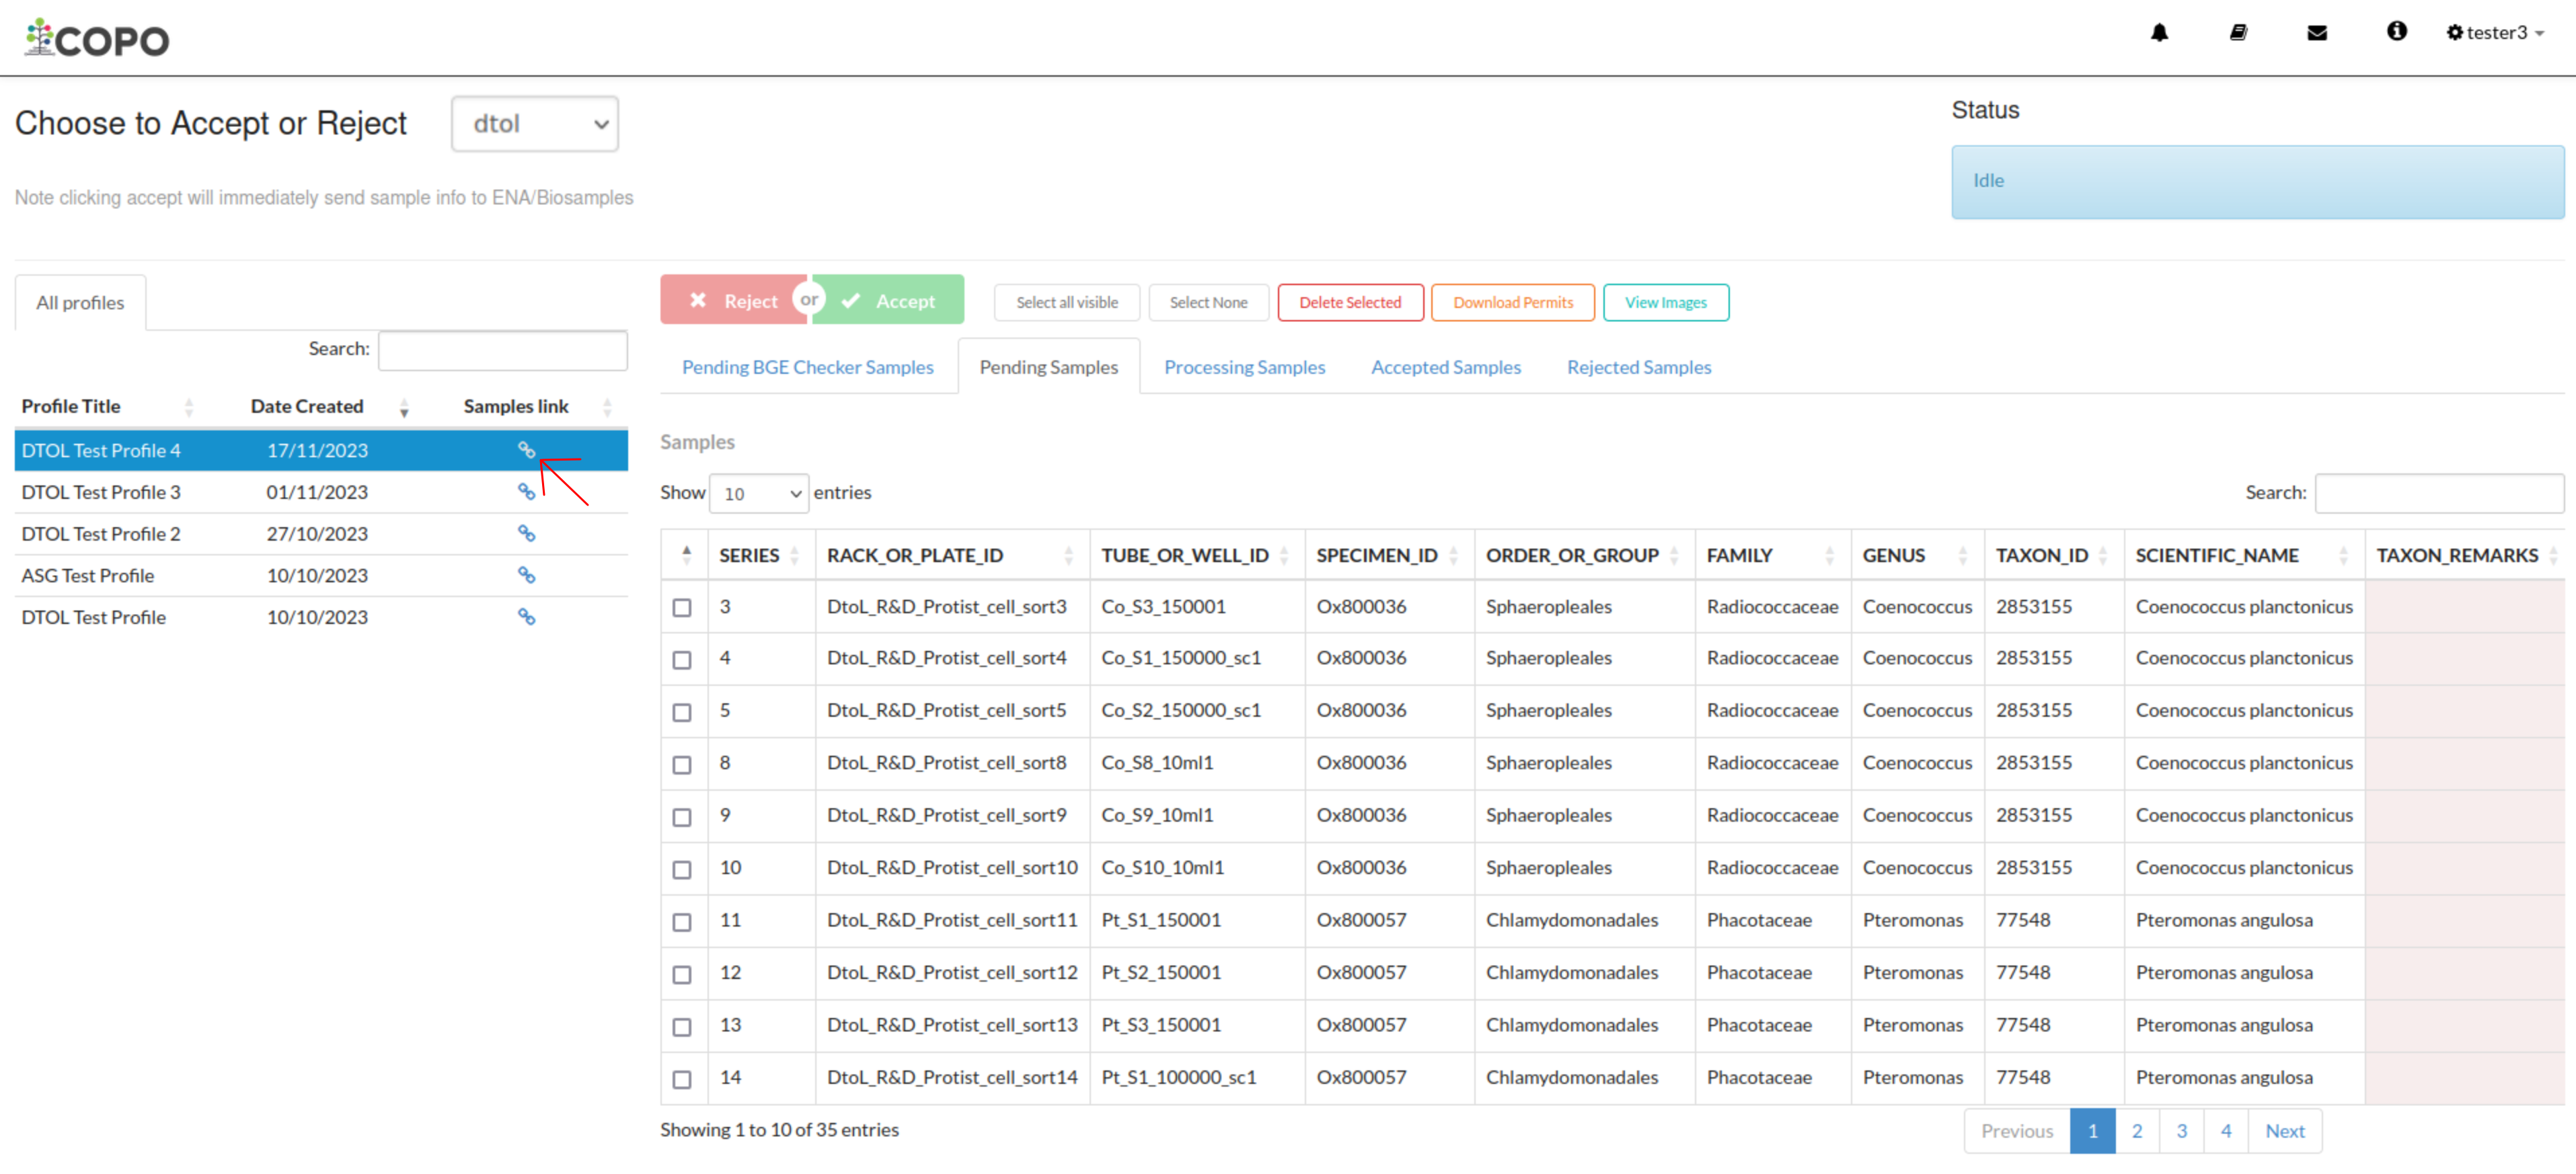
Accept or Reject Samples web page: Navigate to ‘Samples’ web page by clicking the link associated with a DTOL profile
Similarly, if the desired profile is an ASG profile, the same action occurs.
OR
If the desired profile is an ERGA profile, navigate to the Samples web page by clicking the
icon in the Samples link table column of the table row for the desired
profile in the Profiles for My Sequencing Centre tab as shown below: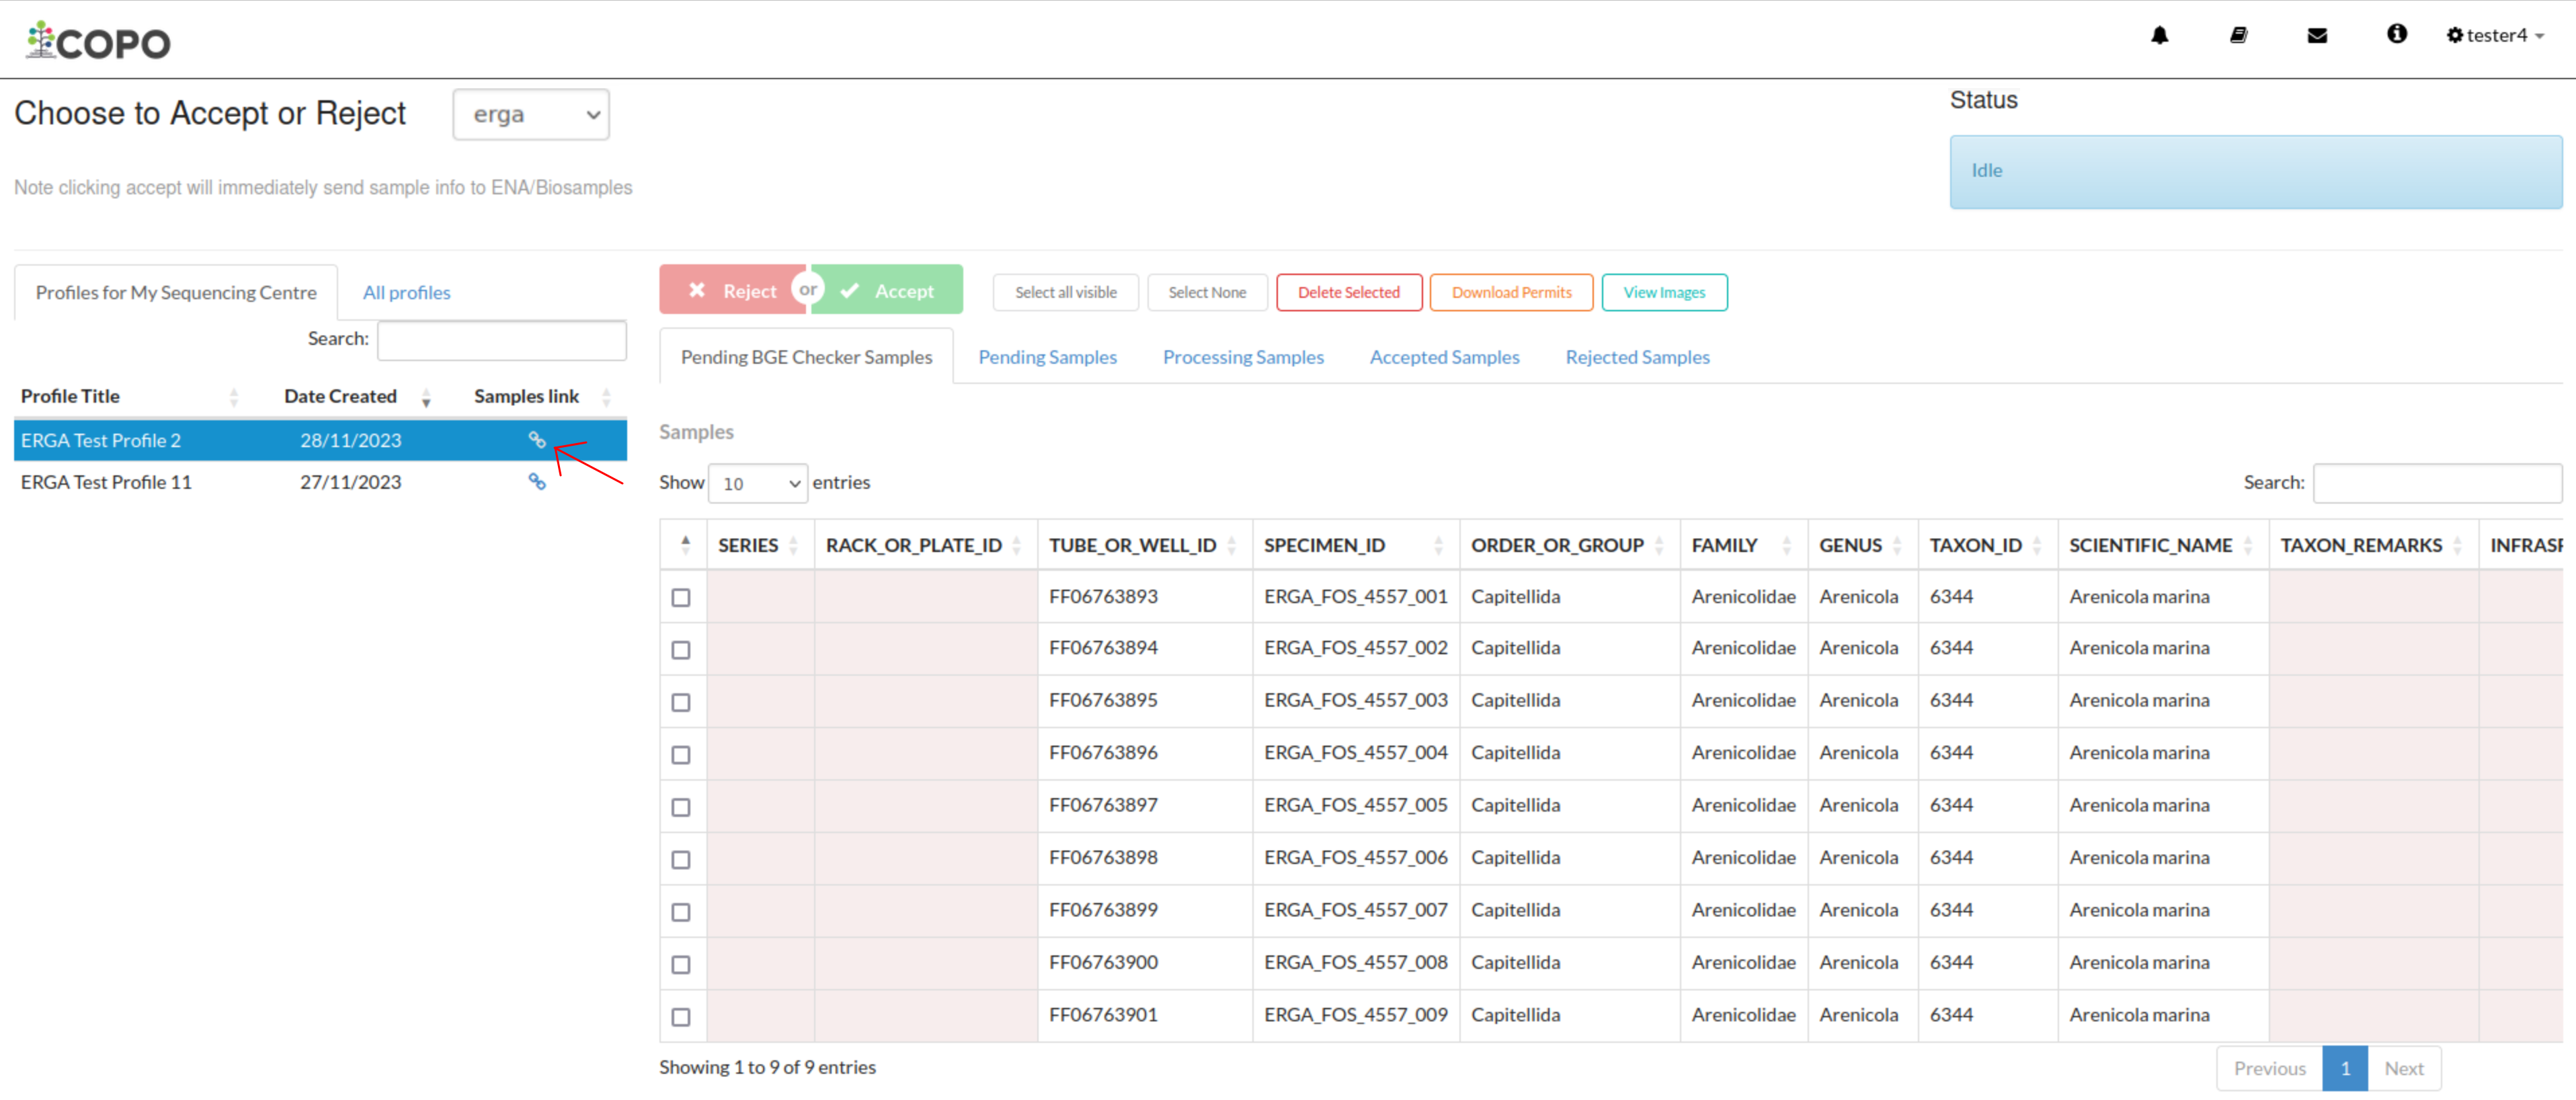
Accept or Reject Samples web page: Navigate to ‘Samples’ web page by clicking the link associated with an ERGA profile
-
The Samples web page will be displayed as shown below:
-
If you do not have the submitted manifest for the profile, see the How to Download Submitted Sample Manifest section for guidance on how to download the submitted sample manifest. Then, refer to the Updating Samples section for guidance on how to submit the modified manifest.
OR
If you have the submitted manifest for the profile, see the Updating Samples section for guidance on how to update the submitted manifest.
OR
If you would like to upload a newer version of a manifest that has already been submitted on behalf of the manifest provider, please follow the steps below:
Download the submitted manifest by following the guidelines described in the How to Download Submitted Sample Manifest section if you do not have the newer version of the manifest with the sample metadata information.
Transfer the sample metadata from the submitted manifest into the newer version of the manifest.
-
Send an email to the COPO team at , indicating the profile type as well as the profile title and requesting that the samples be removed from the profile.
The samples has to be removed from the profile so that the sample metadata in the newer version of the manifest can be registered in the profile.
Important
Please request that the samples be removed from the profile only if you are certain and have the newer version of the manifest with the sample metadata information.
The samples cannot be restored after they have been removed from the profile.
-
Upload the newer version of the manifest by referring to the guidelines described in the desired link below to learn more about each type of manifest submission:
Hint
See Downloading Manifest Templates section for information about downloading manifest templates.
Footnotes